

Specimen Preparation and Labeling
In order to more effectively study the ants that we observe in the field, we collect representatives for future examination. When we collect ants, we typically place them into vials containing 90-95% ethanol, although they are occasionally collected in other ways (see ant collecting tips page for more info on collecting ants). Temporary data labels are placed in each vial with the ants, and collecting information is written down in a log book with a permanent ink pen. After the ants are collected, we bring them back to the lab where they are either stored in 90-95% ethanol or pinned. Vials and pinned material are then labeled with various collecting data, identified, and put into the permanent collection (sometimes this takes a while).
Specimen Preparation
Alcohol Material. When I collect ants from a colony I try to get a large series with as many castes as possible. A few representatives may be pinned, but the majority of the series will be stored in 95% ethanol. I store the ants in vials that are about 5.5 cm tall and 2 cm wide with scintillation caps, which reduce evaporation and leaking. There are many types of vials available, and smaller ones may be more practical for storage and collecting for some people. The main point being that the caps need to be leak proof. After getting back to the lab, I transfer the ants from each collecting vial into a watchglass. I place the watchglass under the microscope where I can sort the ants. Usually there is a good bit of dirt and other debris present in the sample, so I then pull the ants out and place them in a new vial of ethanol. I write an "id" label and put the temporary data label into the vial. Later, the temporary labels will be replaced with permanent labels and the ants will go into the collection.
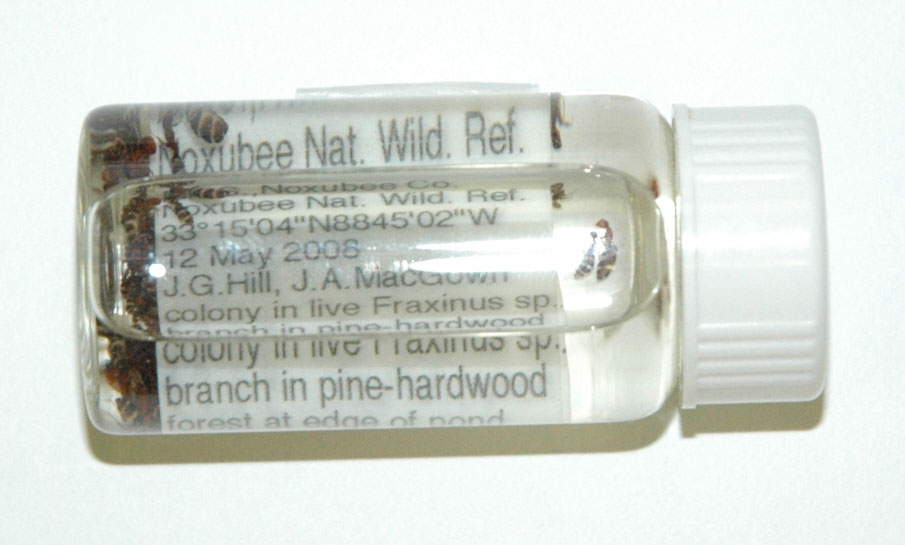
A labeled vial with ants
Pinned Material. It is often necessary and useful to pin some representatives. It is easier to see minute setae and their distributions, textures and sculpture, and other various physical characteristics on dried specimens. First, place ants into a watchglass from a collecting vial. Next, transfer specimens to be pinned to a petri dish with filter paper, making sure that any debris attached to the specimens is removed. Make sure a data label is placed with the specimens. After drying on the filter paper, the ants can be pinned immediately, or may be placed (with a cover on the petri dish) into a freezer to be pinned later.
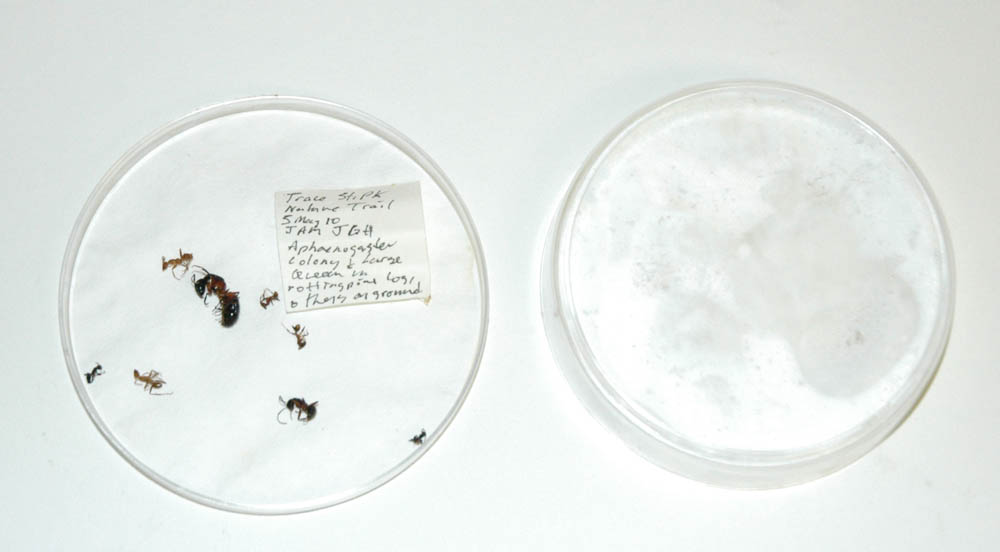
Petri dish with filter paper, ants, and temporary label
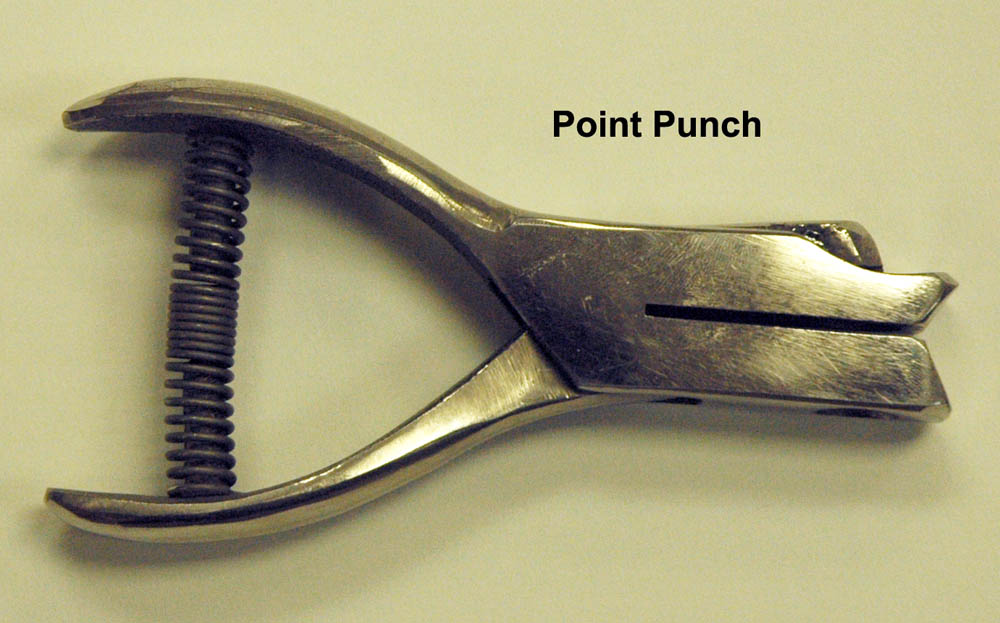
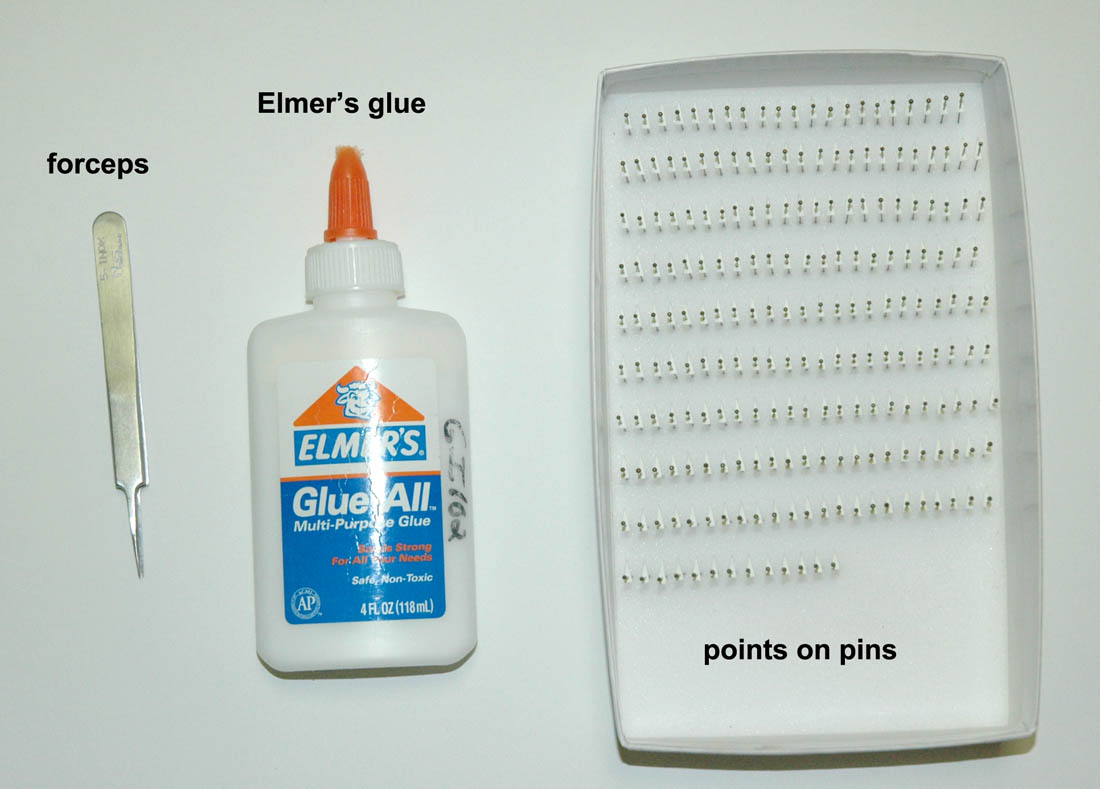
Large ants can be pinned directly through the mesonotal area with an insect pin sized 0-2. However, most ants are too small to be pinned directly and will need to be glued to a small triangular point. We call this process "pointing". Ideally, ants are pointed under a stereomicroscope, which allows for more precise work. Some keen-sighted individuals may be able to point without the aid of a microscope, but I don't recommend it. The small triangular points are created with a "point punch", which is much like a hole punch used for paper. These hand held punches can be purchased at BioQuip (Point Punches Page).
In the museum, we use archival, off-white herbarium sheets for the points. The herbarium sheets work well because they have good tooth (or texture), are acid free, are a good thickness for points, and when cut, do not have ragged edges. There are a multitude of other suitable acid free, white card stock type products available. Typically, many points are punched from the paper at one time and placed in a dish of some type. Next, the points are placed onto a piece of foam, styrofoam insulation, or something else of suitable height.
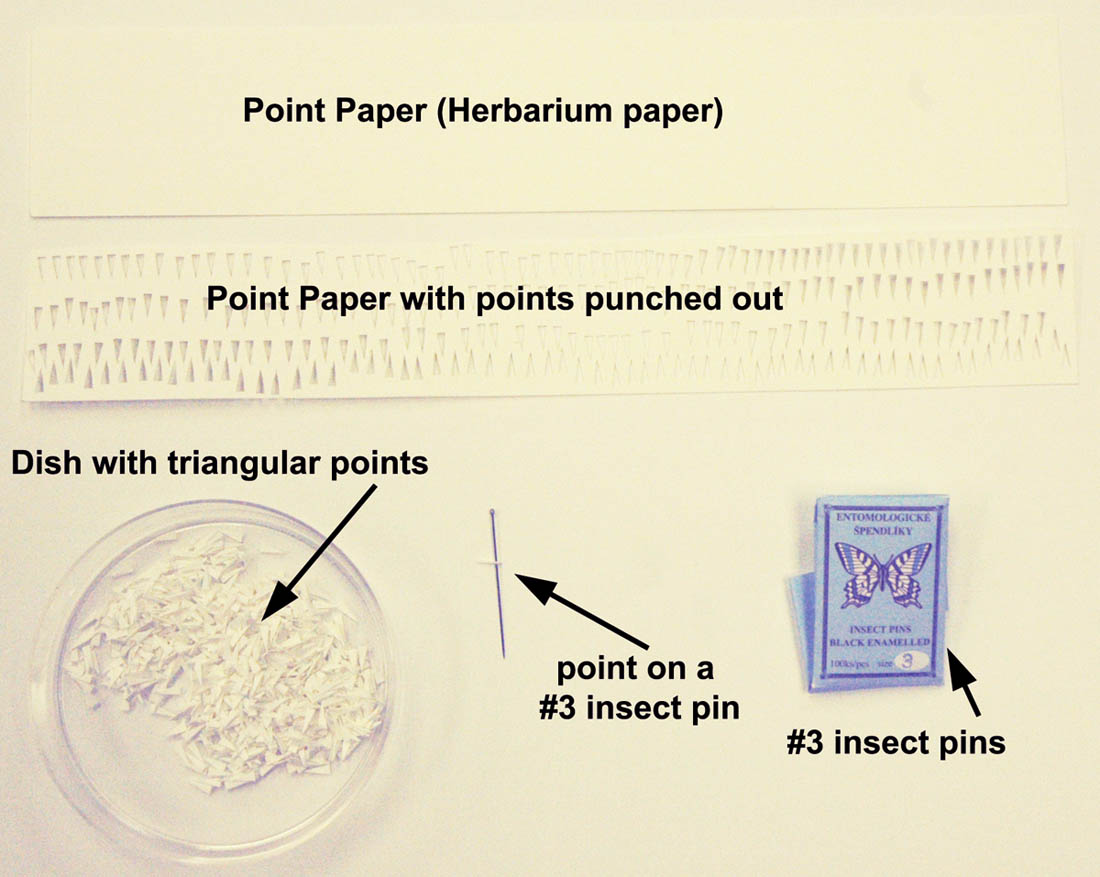
A number "3" pin is placed through the point near the back middle area and pushed through the point to a depth of approximately 2.5 cm. This number is somewhat arbitrary, and different individuals may like the point slightly higher or lower on the pin. In essence, there should be enough room to pick up the pin from the top without touching the specimen and enough room beneath to put multiple labels.
Insulation board for sticking pins through points. Note the scotch tape
which helps to prevent points from pushing through the styrofoam.
To point an insect, place the petri dish with the ants underneath the microscope at low power. Ants can be arranged with a pair of straight tipped forceps. Place an ant on its left side, and, if possible, try to manipulate the legs so that the front pair is facing downward and toward the front, and the middle and hind legs are facing downward and toward the rear.

Ant on its left side
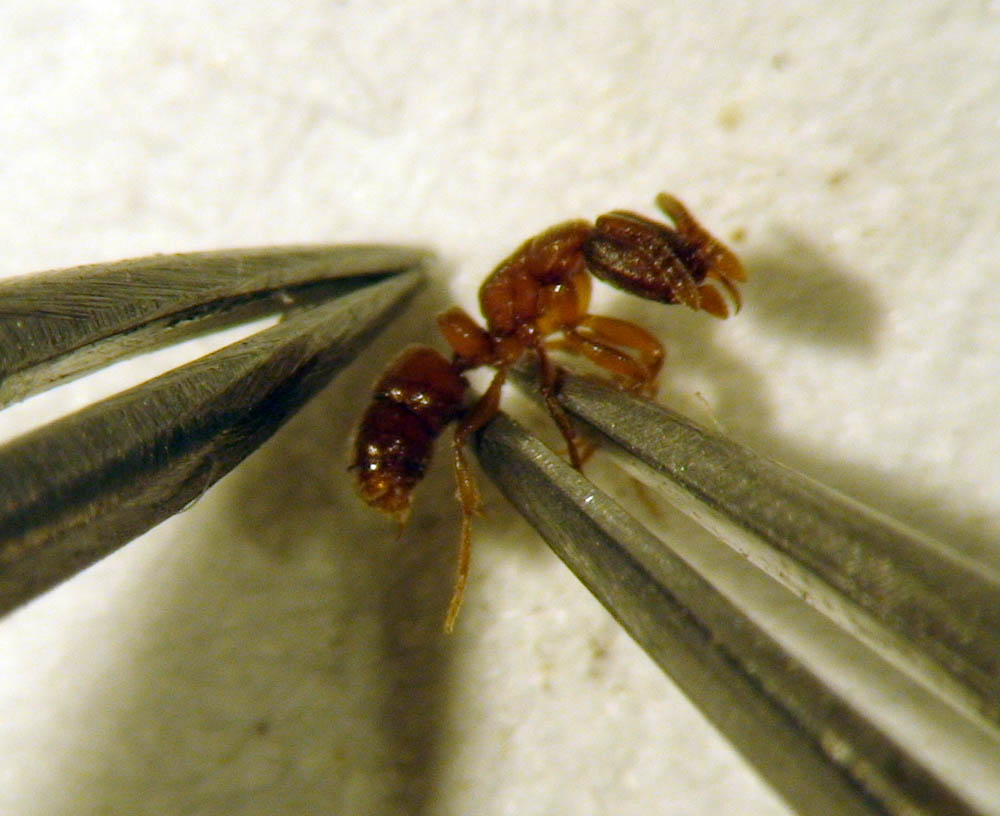
Moving the legs
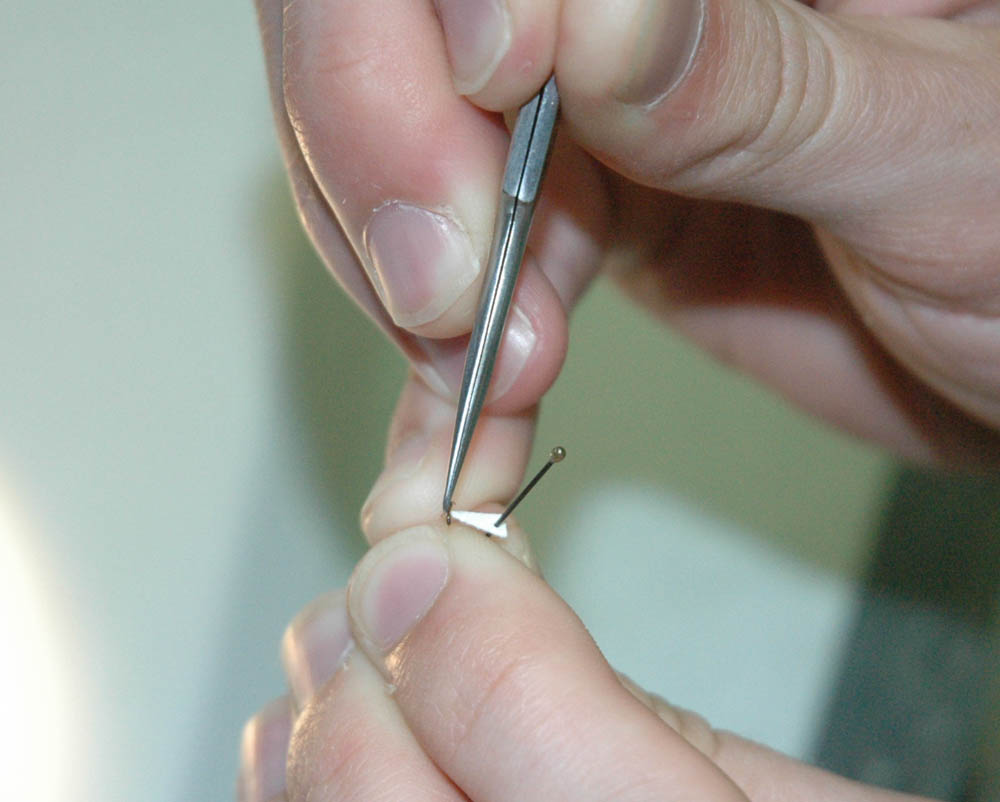
When the specimen is in position, take one of the pins with a point on it, dab the tip of the point lightly in some Elmer's glue, of which a small amount should be poured onto a scrap piece of paper or card stock.
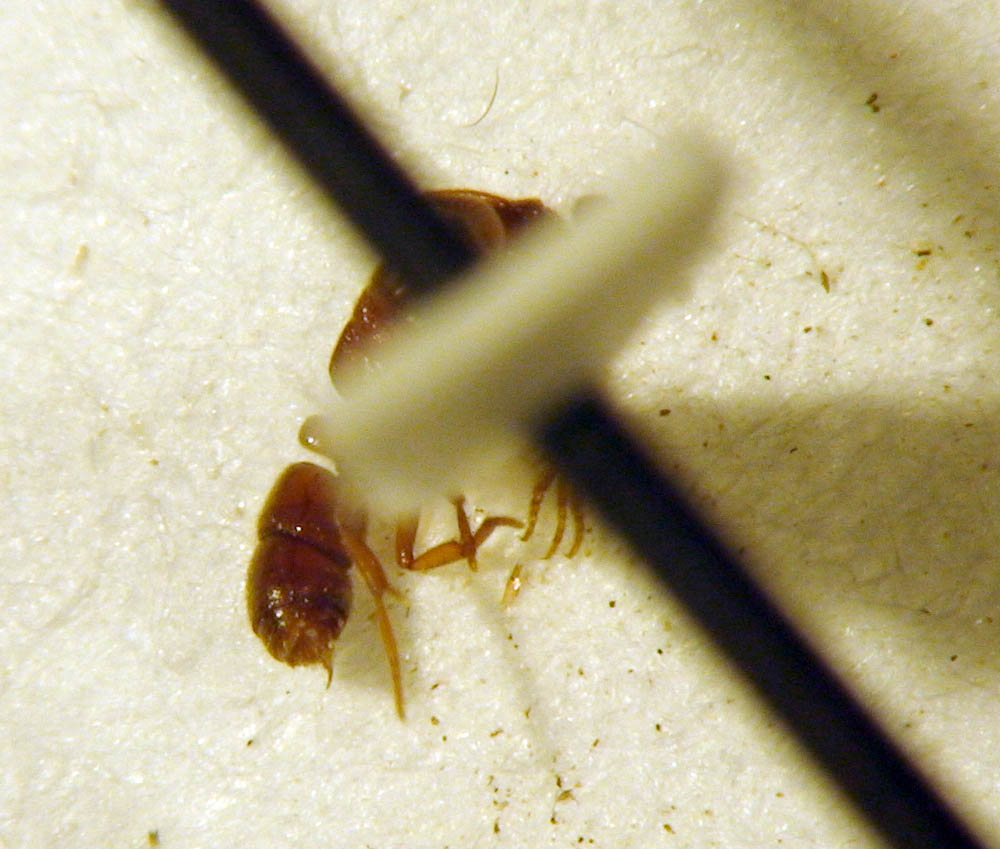
Point with glue to ant
Other adhesives may and have been used for pointing (such as hide glue, nail polish, etc.), but we use Elmer's glue because it is water soluble, easily obtainable, non-toxic, and easy to use. The point, with glue on the tip, is placed (holding the pin from the bottom, and with the head facing slightly downward) just underneath the alitrunk of the ant. If possible, place the tip of the point between the first and second legs. This is not always possible because the appendages do not always cooperate! Don't fret about it if it is not perfect, especially for common species. Do not allow the tip of the point to protrude from the other side of the ant. For larger ants, you must hold the point in place for a few seconds to let the glue dry some. After the point is affixed to the ant, the pointed ant can be further adjusted with fingers or forceps. Note that this method of putting the point underneath the body is slightly different than with some other insects, which may be pointed on the right side or in other areas. I am sure that there are many other variations on how to point an ant or other insect; this is just how we do it here.
Final adjustment
Either the head or gaster may be leaning too far downward, and it is often necessary to move the ant to a level position. The pointed ant is then placed into a unit tray, following the temporary data label. After a group of ants have been pointed, the appendages can be further manipulated with straight tipped forceps.
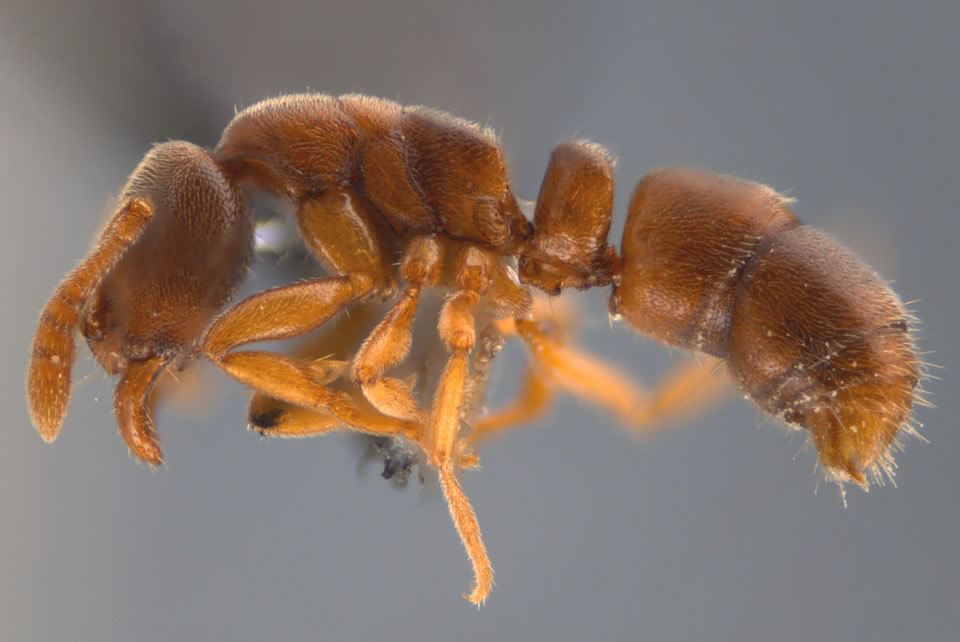
Pointed ant
Labeling (also see our in depth page on labeling specimens)
Collections of insects for scientific study are essentially just "pretty bugs" unless they are labeled with locality, date, collector, collecting method, habitat or other pertinent collecting information. Field labels can be simplified, or coded. Make sure to include more in depth information in a log book. A typical field label would include an abbreviation for the state, county, a locality name, date, collector's initials, and brief information about the collecting method or habitat.
Unlabeled pinned specimens with temporary labels.
Label Info. For locality, we include State (if in another country, we would include the country), County (or Parish or comparable designation), locality (such as a town or city or a given number of miles or kilometers from a town or city), and latitude longitude. We use a handheld GPS unit to get the lat/long info on site. We typically use the format: 32°34'31"N 82°26'30"W, but there are other formats that can be used as well. Following the lat/long on the label is the date. We use the format: 23 April 2009. The collector(s) follow the date. Other collecting information would be included on a second, smaller label for pinned material, or on the same label for specimens that stay in alcohol. After the specimens are labeled, they can then be identified and given a determination label. This label should include the species name and author, year the determination was made, and name of the identifier.
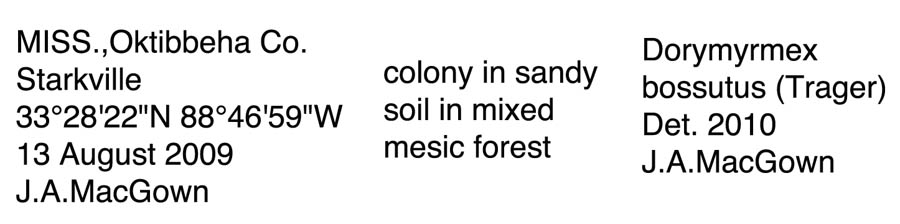
Format used by MEM for labels: label with locality, date, and collector (left), habitat/collecting
method label (middle), and determination label (right)
Alcohol Labels. Labels used in alcohol are created using Microsoft Word (or a similar word processing program) and are printed using an inkjet printer with water proof black ink. We currently use a Lexmark Prestige Pro805, but other inkjet printers would likely work as well as long as the black ink is water proof. For some reason, labels printed on a laserjet printer do not hold up as well in alcohol and the letters may flake off. Apparently, ink from an inkjet printer binds with the fibers of the paper better. We print our labels on white, 36#, acid free,100% cotton, Byron Weston Co. Linen Record paper; but, of course, there are many other suitable paper types that would work just as well.
For the vial size I use, a font size of "8" works well. To view the characters at a larger size, just increase the view to a larger size. A sans serif type font, such as Helvetica, is ideal. To make the labels, simply type in the information, then select, copy and paste to make multiple labels (if needed). To make multiple columns on a page, click the Format tab, then click columns. Type in the number of columns desired; in this case, 6 columns works well. For spacing, type in 0.05-0.08, then click okay. Margins can be adjusted by selecting the Format tab and clicking "Document". I adjust my margins to 0.25" for the top, 0.2" for the bottom, 0.3" for the left, and 0.25" for the right. This allows you to print more labels on a piece of paper. When typing labels with columns using the copy and paste method, some of the labels may get "cut off" at the bottom of the pager. To avoid this, simply press the return key at the bottom of the last label that is complete. This will push the next label to the top of the next column. Another thing to make sure of is that the spacing between lines is right and there is not too much space between them. This is easily done by clicking the Format tab, then clicking "Paragraph". In the Spacing section, change Line Spacing to "Exactly" and in the "At" box, type 8 pt. Once you have typed all of your labels, you can print them. Printed labels may be cut with scissors or with some type of paper cutter. Trim labels tightly leaving as little room as possible around the edges.
Labels for Pinned Material. Labels used for pinned material are created in much the same way as those for alcohol samples, except they are printed at a smaller size and on a laserjet printer. We use an HP laserjet 1200 printer, which is fairly old, but still works well. The main differences between the labels for pinned material and alcohol material are size: we print the labels for pinned material at a font size of 4; have between 11 and 12 columns on a page; adjust the line spacing to be exactly 4; and print with a laser printer. After printing, trim labels carefully so as not to cut off any information. After labels are cut out, pinned specimens can then be pushed through each label. One way to do this is by using a wooden pinning block that has premade heights for different labels, and a hole through the wood in which the pin in pushed through after first going through the label.
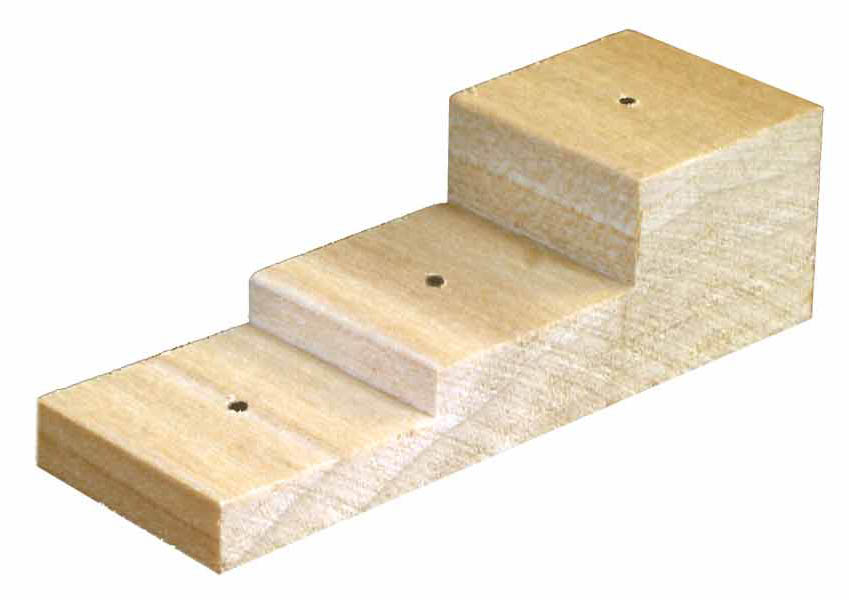
Pinning Block
When labeling insects, always arrange specimens from left to right in the unit tray, and when one row is finished, start immediately below to the far left and continue the same pattern. Labels should be applied so that they cover up the entire specimen from underneath (at least as much as possible). For material that is pinned directly through the body, the label should be oriented so that the words are aligned with the right side of the body, but for pointed material, the labels should be oriented so that the words are aligned with the right edge of the point (see image below). After pinning is completed, the unit tray should be placed into a tight fitting drawer to prevent unwanted insects from damaging the ants.
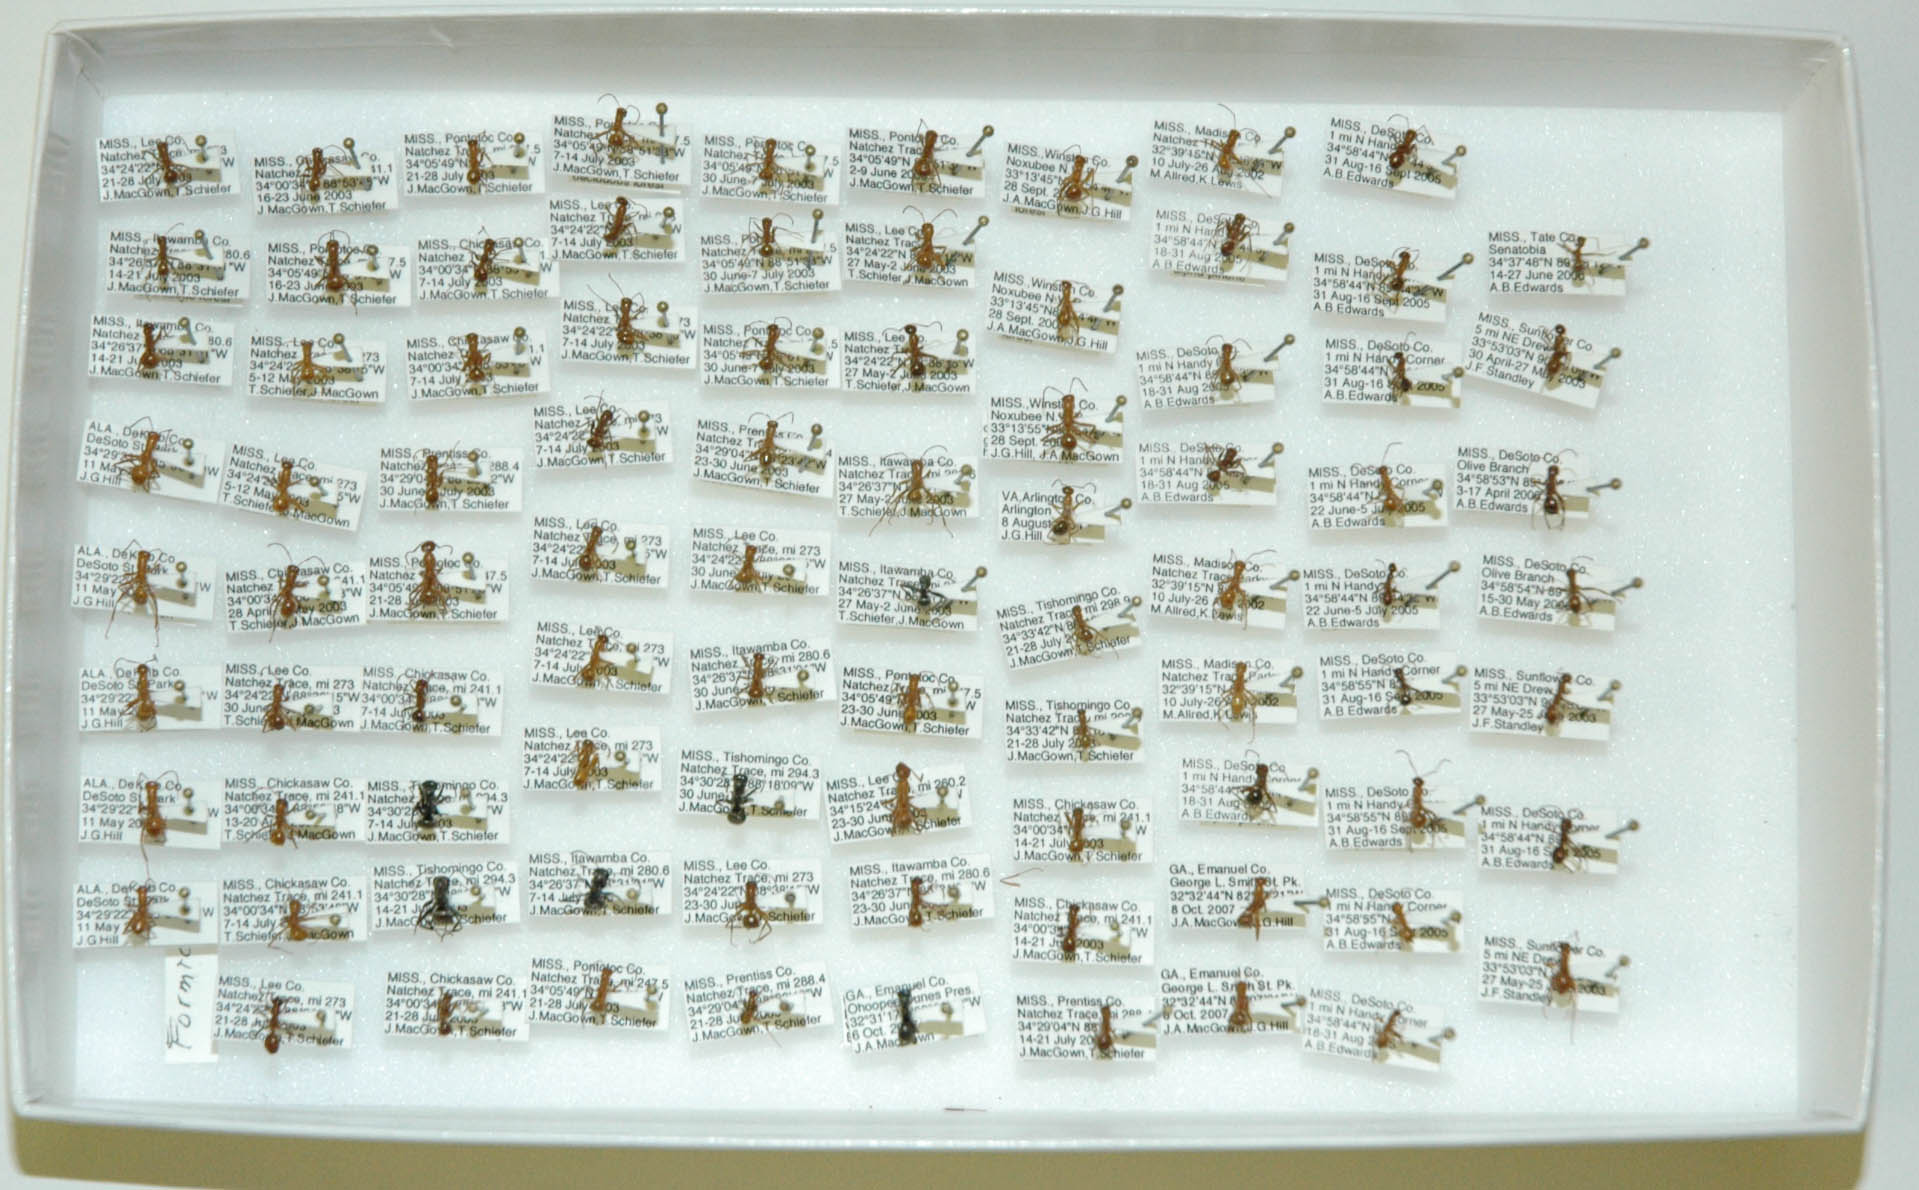
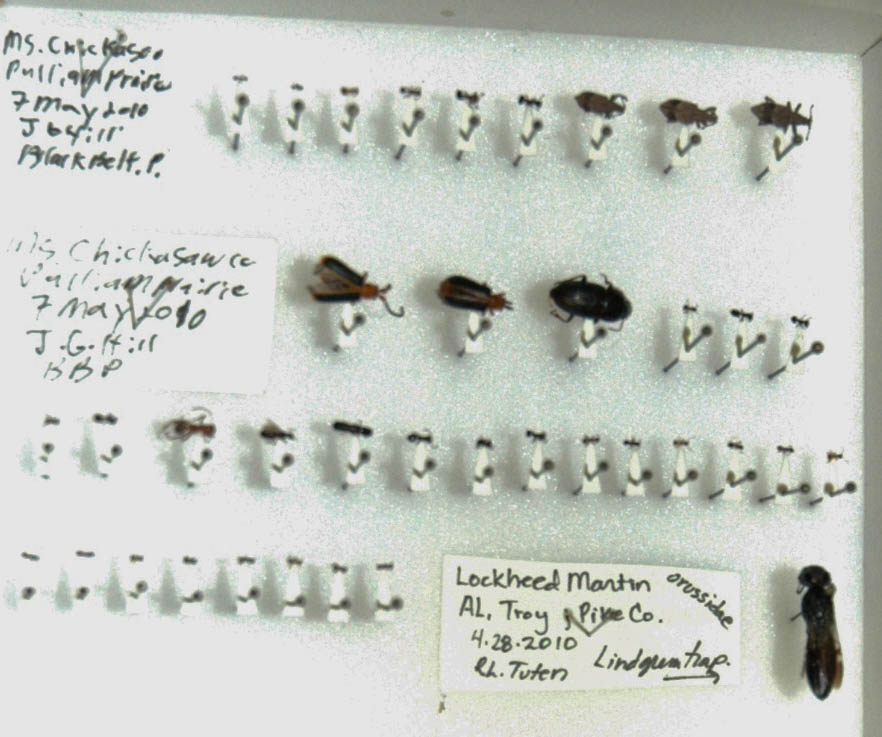
A tray of pointed ants (Formica species)
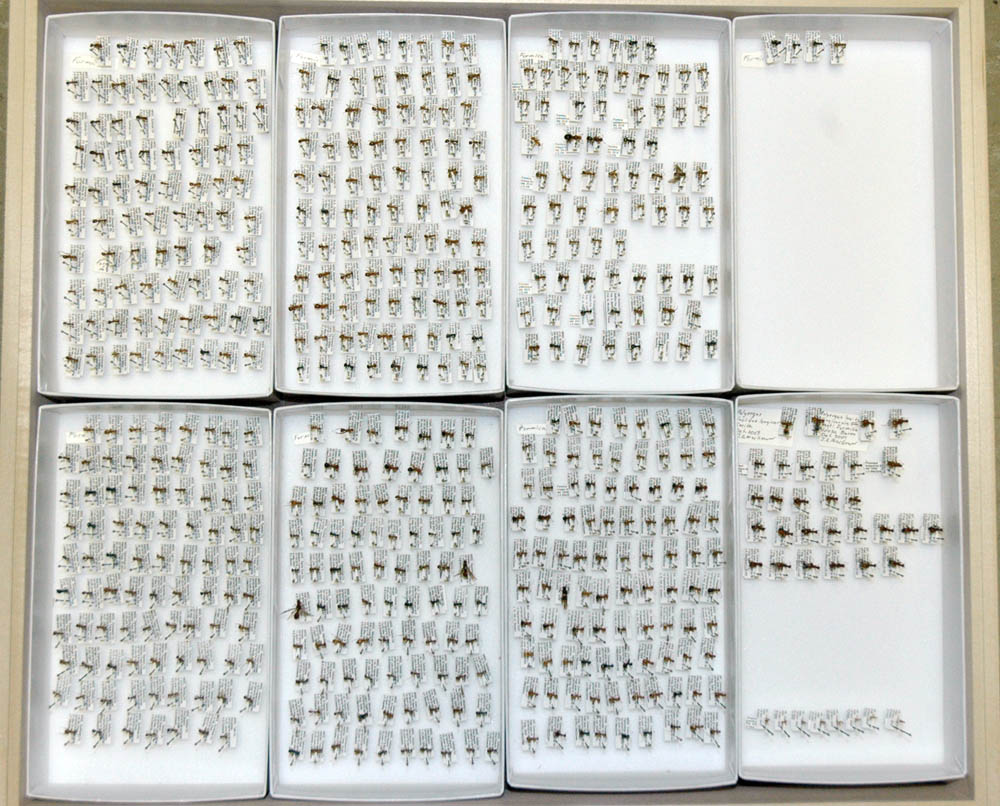
A drawer of pinned, labeled ants.
